AI Agent pro
Added in version 3.16.0.
This page of the data inspector lets you connect an external AI coding agent (e.g. Claude Code, GitHub Copilot CLI, OpenAI Codex, and others) to your running OVITO Pro session. The agent runs right inside the OVITO main window and has live access to the scene you are working on – it can inspect the data pipelines you have built, run Python code against them, and see the same viewports and panels you see.
This turns OVITO Pro into an interactive AI-assisted workspace: instead of switching back and forth between OVITO Pro and a separate chat window, you can ask the agent to write and run Python scripting code for you, have it help track down why a modifier produces an unexpected result, or simply describe an analysis or visualization task in plain language and let the agent turn it into a working data pipeline. Because the agent operates on the exact same session you are looking at, you can take over at any point, and it can pick up again from whatever state you left the scene in.
To see what this looks like in practice before reading on, jump ahead to the example workflows below, which show how the agent can autonomously carry out various tasks in OVITO, based on natural-language prompts.
How it works
The integration is built on the Model Context Protocol (MCP), an open standard that lets AI coding agents call out to external tools. It has three parts:
The coding agent is a third-party command-line program (Claude Code, Copilot CLI, Codex, etc.) that you install and configure yourself, exactly as you would for any other project. This applet simply launches that program for you inside an embedded terminal, docked into OVITO’s main window for easy access.
The
ovito-mcpMCP server is a small Python package, developed by the OVITO team, that you add to your coding agent’s list of available MCP tool providers (see Setting it up below). It is the bridge between the agent and OVITO: the agent calls tools such as run this Python code, take a screenshot of the window, or list the pipelines in the scene, and the server translates these calls into commands sent to OVITO. Despite the name, it is not a server you have to start or keep running yourself: your coding agent launches it on demand as a short-lived helper process and shuts it down again when it exits.OVITO Pro’s embedded Python interpreter is what actually executes those commands, in the same process and on the same scene as the OVITO window you see on screen. When you click Start, OVITO starts a private Jupyter kernel inside itself and passes its connection details to the newly launched agent process as part of its initial prompt, so the agent knows how to reach it through the
ovito-mcpserver.
Put together, this gives the agent two complementary ways of “seeing” what you are doing: visually, by taking a screenshot of the OVITO window on request, and structurally, by directly inspecting the live data collections, pipelines, and modifiers in your scene. Because all of this happens against the same running session, you and the agent are effectively looking over each other’s shoulder and can solve problems together interactively, rather than the agent working blind on a description of the problem.
Setting it up
Before you can start a session, three things need to be in place on your computer: the coding agent itself, the
ovito-mcp package, and an entry in the agent’s configuration that tells it about ovito-mcp. This is a one-time
setup – afterwards, starting a session is just a matter of pressing Start in this panel.
You will need:
OVITO Pro 3.16 or newer.
Python 3.10 or newer, in a Python installation of your own (see the note under step 2).
A coding agent CLI, installed and set up following its vendor’s instructions – including whatever user account, subscription, or API key it requires. OVITO Pro does not provide the agent or the underlying language model.
Step 1: Install the coding agent
Follow the installation instructions of the agent you want to use, e.g. Claude Code, GitHub Copilot CLI, OpenAI Codex, OpenCode, or Google Antigravity. Verify that its command works in a normal terminal before continuing; OVITO Pro launches the very same command for you.
Step 2: Install the ovito-mcp package
The package is distributed via PyPI:
pip install ovito-mcp
Install this package into a Python environment your coding agent can access – and not into OVITO Pro’s embedded Python interpreter.
Step 3: Register ovito-mcp with your coding agent
pip installs ovito-mcp as a console script that launches the MCP server. Register it with your agent using the
script’s absolute path, which you can look up with (Get-Command ovito-mcp).Source on Windows or which ovito-mcp
on Linux and macOS.
Some agents let you register the MCP server from the command line – for Claude Code, for instance, you can substitute the lookup directly:
# Windows (PowerShell)
claude mcp add ovito-mcp --scope user -- (Get-Command ovito-mcp).Source

# Linux and macOS
claude mcp add ovito-mcp --scope user -- "$(which ovito-mcp)"
Other coding agents are instead configured by editing a file; enter the same absolute path there as the launch command. See the ovito-mcp installation instructions for the per-agent details.
Step 4: Start a session
Open this AI Agent tab in OVITO Pro, select your agent from the drop-down list, and press Start, as described in the next section.
Note
The first time you start a session, OVITO Pro downloads and installs the ipykernel package into its embedded
Python interpreter, which it needs in order to expose the running session to the agent. This happens automatically and
is shown in a progress dialog; it requires an internet connection and only occurs once per OVITO Pro installation.
If something doesn’t work
- OVITO Pro reports that the executable could not be found
The selected agent is either not installed or not on the
PATHthat OVITO Pro sees. Note that this is not necessarily the samePATHyou get in a terminal: applications started from the Finder or the Dock inherit a minimal systemPATHand do not see directories added by your shell startup files.On macOS, OVITO Pro compensates for this automatically: before launching an agent it asks your login shell (the one named by the
SHELLenvironment variable) for itsPATH, and searches that in addition to its own. Directories added by~/.zprofile,~/.zshrcand the like – which is where agents installed vianpm,pipx, or Homebrew usually end up – are therefore found without any manual setup, and the samePATHis passed on to the agent process so that it can locate its own helper programs.If the agent is still not found, either it is genuinely not installed, or it lives in a directory that your login shell does not add to
PATHeither. In that case, select Custom… in the drop-down list and enter the agent’s full path in the Command line field. Note that OVITO Pro sets the environment variableOVITO_RESOLVING_ENVIRONMENT=1while querying the shell, so that lengthy startup files can skip work they don’t need to do for this probe; make sure your startup files still set upPATHwhen that variable is present.- The agent starts, but says it has no OVITO tools available
The agent is running, but has not been told about
ovito-mcp– revisit step 3. Most agents offer a command to list their configured MCP servers, which is the quickest way to check whether the entry was picked up.- The agent finds the configuration entry, but fails to launch
ovito-mcp Make sure the configuration entry uses the absolute path to the
ovito-mcpconsole script, as recommended in step 3.
Launching a coding agent
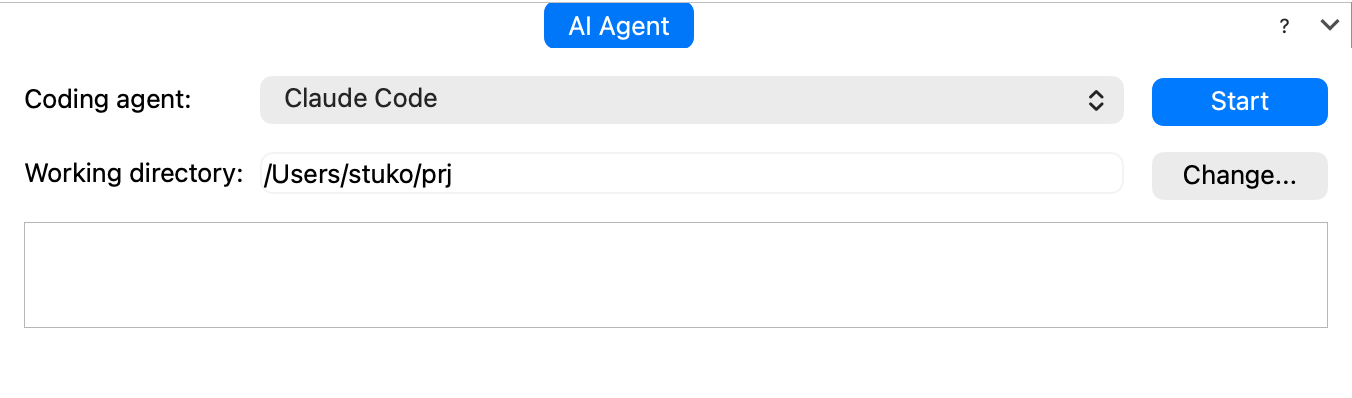
The agent panel in OVITO’s data inspector offers the following controls:
- Coding agent
A drop-down list of coding agent CLIs that OVITO Pro knows how to launch out of the box, each with the command line arguments it requires to receive the initial connection prompt. Pick one of these presets, or select Custom… to connect an agent that isn’t in this list.
Choosing Custom… reveals a Command line field where you enter the full command used to launch the agent, including its executable name (or full path, if it is not on your system’s
PATH) and any command line arguments it needs. The command line must include the placeholder<PROMPT>somewhere in it; OVITO replaces this placeholder with the actual connection prompt when it starts the process. The field is initially filled in with the equivalent command line of whichever preset agent you last used, as a convenient starting point, and remembers whatever you subsequently type into it.- Working directory
The directory the agent process is started in, shown by Change… to pick a different one. This is typically relevant if the agent inspects or modifies files in your project folder in addition to talking to OVITO.
- Start
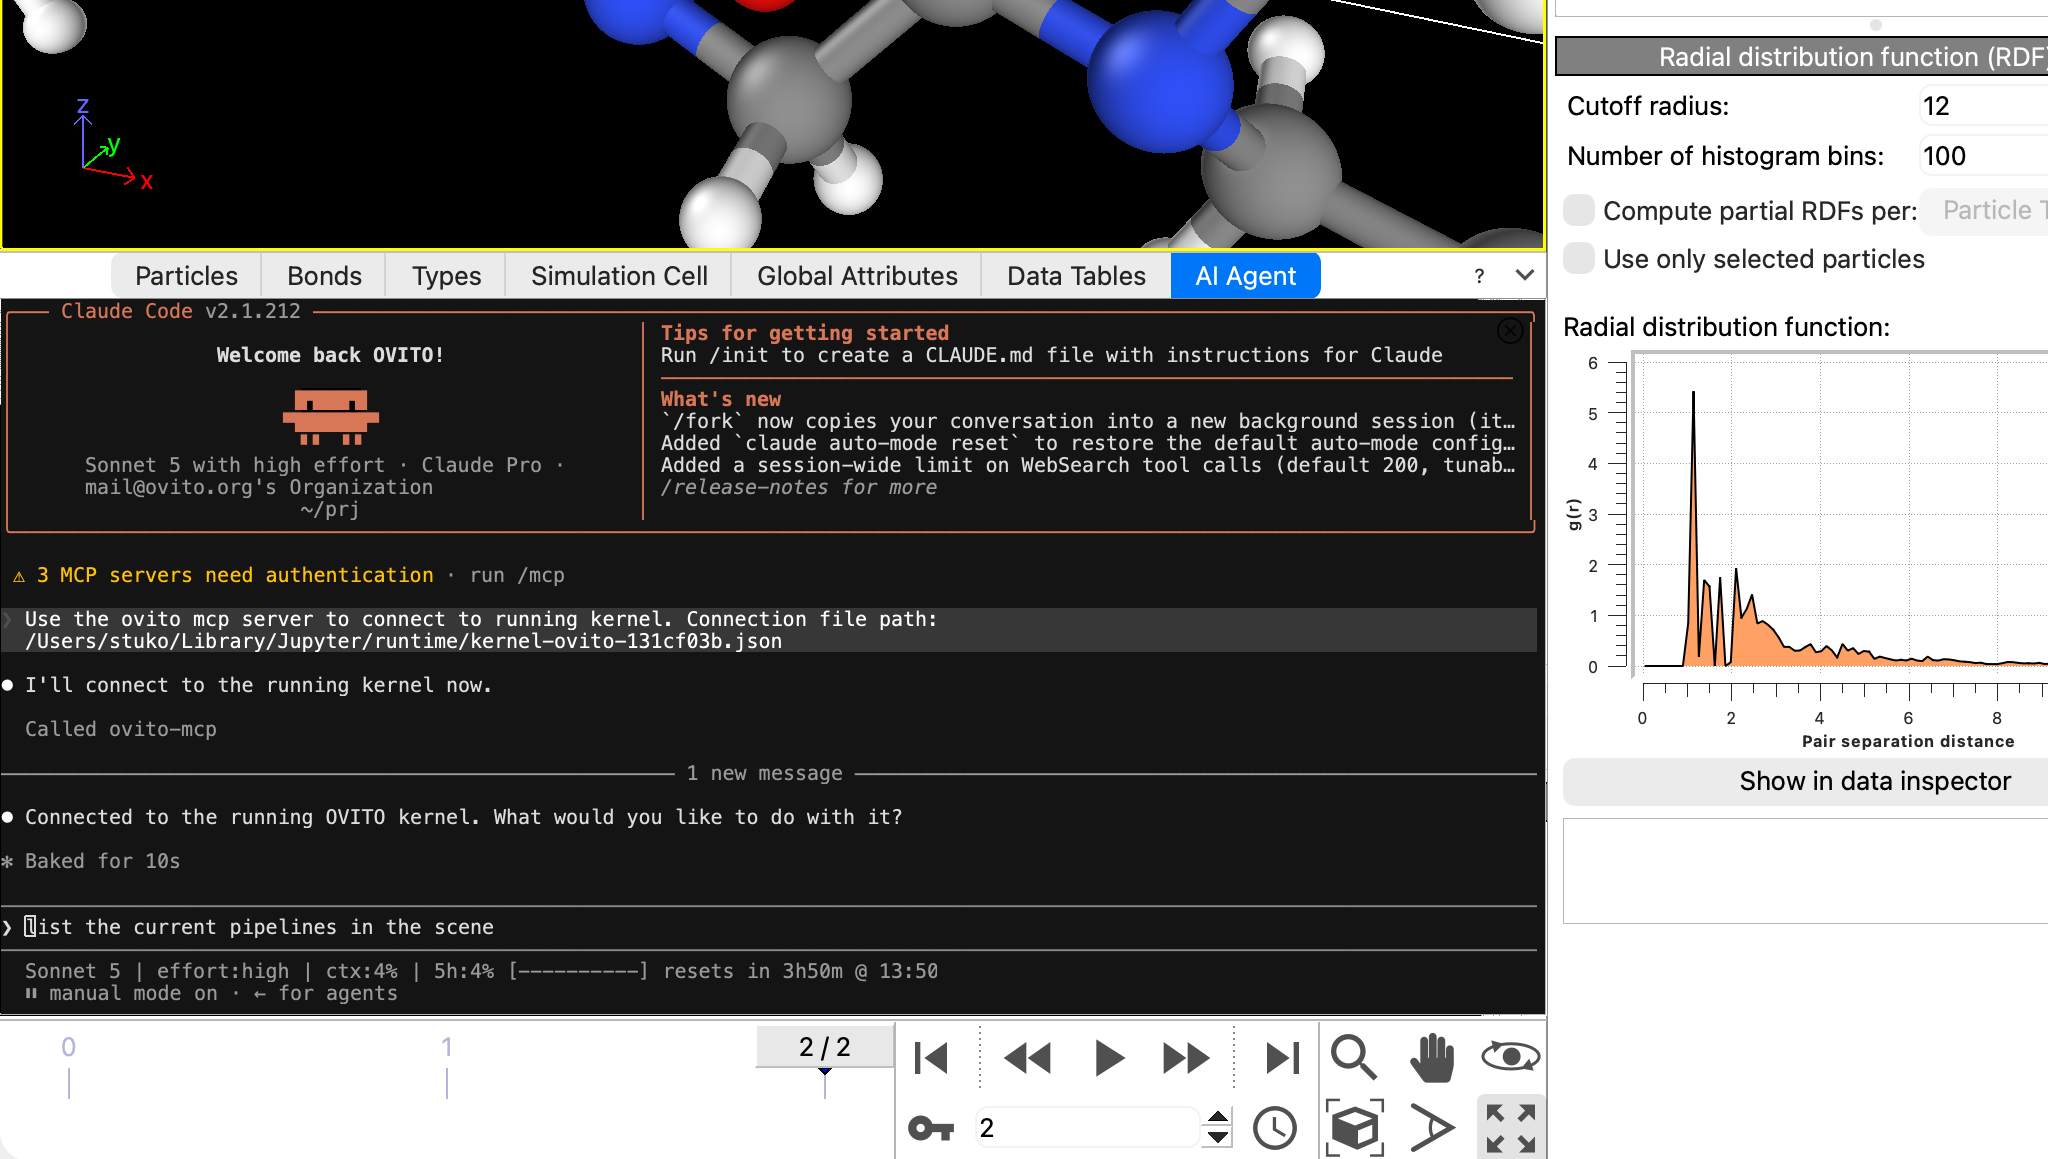
Launches the selected coding agent. The panel switches to an embedded terminal showing the agent’s own text interface, which you can interact with directly, just like you would in a regular terminal window. A small close button in the top-right corner of the terminal ends the session and returns to the launcher form; the session also ends automatically once the agent process exits on its own.
Note
Only one coding agent session can be active at a time per OVITO Pro instance, since the embedded Python interpreter is shared by the entire process.
Working in the terminal
The embedded terminal behaves like the terminal application you are used to, including the following commands. They are all also available from the terminal’s right-click menu.
- Adjusting the font size
Added in version 3.16.1.
Hold Ctrl (Command on macOS) and turn the mouse wheel, or press Ctrl/Command together with + or -, to enlarge or shrink the terminal’s text; Ctrl/Command and 0 restores the system’s default size. The size you pick is remembered for subsequent program sessions. This is particularly useful on high-resolution displays, where the system’s default fixed-width font can appear very small.
- Copying and pasting
Select text with the mouse and copy it with Command-C (Ctrl+Shift+C on Windows and Linux); paste with Command-V (Ctrl+Shift+V). A plain Ctrl+C is passed on to the agent as an interrupt signal, just as in any other terminal. While a full-screen agent interface has taken over the mouse, hold Option (Shift on Windows and Linux) while dragging in order to select text locally.
Security considerations
Connecting a coding agent to OVITO Pro gives it the ability to execute arbitrary Python code with the same privileges as your OVITO Pro session, including full access to the file system, network, and any data loaded in the current scene. Keep the following in mind:
Only connect coding agents and MCP servers that you trust. The
ovito-mcpserver itself does not add any access restrictions on top of what the agent can already do on your machine.As with any AI agent that can call tools autonomously, review consequential actions it proposes (e.g. deleting or overwriting files, running exports, making network requests) before letting it proceed, and be mindful of prompt injection risks if the agent processes untrusted external data.
If your coding agent uses a cloud-hosted LLM, be aware that code, error messages, and screenshots exchanged with the agent may be transmitted to that provider. Take this into account if you are working with sensitive or proprietary data.
Workflow examples
The following screen recordings illustrate what a session with a connected coding agent (Claude Code in this case) can look like in practice.
Analyzing a grain boundary in a bicrystal
- Where it runs
Claude Code, running inside OVITO Pro’s AI Agent tab.
- Goal
Characterize a grain boundary and identify its repeating structural units.
- Prompt
“Analyze the grain boundary in this sample and highlight repeating structural units in the boundary.”
- What the agent did
Inspected the sample already loaded in the OVITO session – a bicrystal cell of 73,920 atoms, thin along Y (10.2 Å), representing a 2D-periodic grain boundary
Ran structure identification via polyhedral template matching
Determined the boundary plane, tilt angle, and tilt axis
Used an FFT to measure the periodicity along the boundary
Color-coded the repeating structural units and aligned the camera to the boundary
- Result
Quantity
Value
Misorientation
50.5° about ⟨110⟩ (tilt axis y) → Σ11
Grain A axes
x = [311], y = [011], z = [2̄33̄]
Grain B axes
x = [311], y = [011̄], z = [233]
Boundary plane
{332} in both grains → symmetric tilt
CSL period
√11·a₀ = 11.99 Å (15 per cell)
Structural unit
5.99 Å – 30 per boundary
Unit content
20 atoms (5 projected sites × 4 {110} layers): 8 HCP + 12 disordered
a₀
3.614 Å
The repeating units are shown in alternating orange and blue – one full CSL period corresponds to one orange unit and one blue unit.
Visualizing electron density in ethylene
- Where it runs
Claude Code in a terminal, connected to the
ovito-mcpserver, which launches the OVITO Pro GUI to carry out the request.- Goal
Visualize the electron density in an ethylene molecule.
- Prompts
“Import the ethene molecule from the working directory into OVITO and show the electron density along a representative slice.”
“Add bond orders and a colorbar to the viewport using the preview mode.”
“Color the bonds by particle types / colors.”
- What the agent did
Located and loaded the CHGCAR charge-density file from the working directory
Computed the molecular plane and added a slice modifier along it
Validated the units in the charge density file
Assigned particle types C and H to numeric types 1 and 2
Aligned the camera normal to the molecular plane
Hid the full charge density grid, leaving only the particles and slicing plane visible
Applied a linear color map, recognized it was oversaturated, and switched to a logarithmic color scale
Switched to preview mode and added a color legend
Computed bond orders and assigned them to the bonds
Colored the bonds to match their corresponding particle colors
- Result
An annotated, publication-ready image, generated from three natural-language instructions instead of a long sequence of manual modifier and viewport configuration – ready for final rendering with OVITO’s HQ rendering engine.
Recreating a figure from a scientific paper
- Where it runs
Claude Code, running inside OVITO Pro’s AI Agent tab.
- Goal
Reproduce the analysis and viewport layout of a figure from a published paper, using a different sample already loaded in the OVITO session.
- Prompt
“Please take a look at this image and recreate the analysis and view from my data already loaded into the OVITO session. The sample is different, so the results will be different. Do not manipulate the data to get better agreement. Match the view and layout of the provided image in the viewport.” – with the following reference image attached:
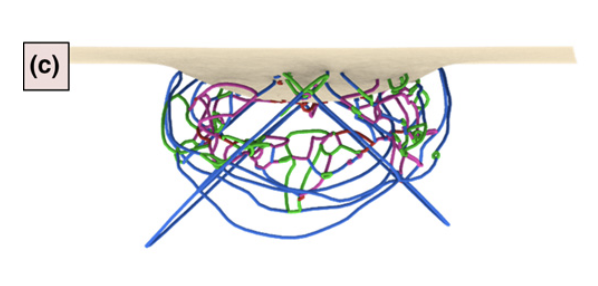
The reference figure from the paper, provided to the agent as a visual prompt.
- What the agent did
Identified the sample: Sr, Ti, and O atoms forming SrTiO3, cube-oriented with a = 3.905 Å and a free surface at the top (z ≈ 0)
Selected the Sr+Ti cation sublattice, which is geometrically BCC (B2/CsCl), to enable dislocation analysis
Applied the Dislocation Extraction Algorithm (DXA)
Hid the particles from view
Matched the dislocation line coloring to the reference figure
Adjusted the defect mesh coloring to match the reference and disabled cap polygons
Adjusted the camera to match the reference viewport
Computing a diffusion coefficient
- Where it runs
Claude Code in a terminal – no full OVITO Pro GUI session required.
- Goal
Compute and plot the diffusion coefficient across a trajectory.
- Prompts
“Please read the trajectory in the diffusion_trajectory directory and compute the diffusion constant using OVITO.”
“The timestep is 1 fs. Please plot the result.”
- What the agent did
Located and loaded the trajectory from
diffusion_data_*.dump.gz: 1,000 frames in a 5 Å cubic periodic boxApplied the Unwrap Trajectories modifier – necessary because the total MSD reaches 30 Ų against a box half-width of only 2.5 Å, meaning wrapped coordinates would artificially saturate the MSD
Computed the mean squared displacement (MSD) using the Calculate Displacements modifier
Performed a linear fit of MSD vs. time to compute the diffusion constant, based on the Einstein–Smoluchowski relation
Plotted the MSD curve and fit using Matplotlib
- Result
Fit: MSD = 0.2941·t − 0.057, with t in ps
R² = 0.995
D = 0.0490 Ų/ps = 4.90 × 10⁻⁶ cm²/s

The diffusion coefficient plot generated by the agent.
Give us feedback
This AI agent integration is a new addition to OVITO Pro, and we would love to hear from early adopters about your experience with it: what worked well, what didn’t, and what would make it more useful for your workflows. Please send your feedback, bug reports, or suggestions to support@ovito.org.
See also